
Saturday, February 18, 2012

Friday, February 17, 2012
Recycled Bottle Top Mosaics


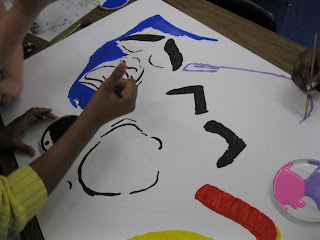
This lesson was taught to my "art enrichment" students. It is comprised of only 3rd, 4th, and 5th graders. We discussed what the different types of "fine arts" included. Then we talked about what the word "advocate" meant. We talked about the importance of spreading the word of how important the arts are!

To start, students looked at examples of drama faces, paint pallettes, and guitars and music notes. Then, they sketched out their own versions of the images onto large scale foam boards. Next, the painted the images in with acrylic paint. After that, they laid out bottle caps on top of the paint; making sure to coordinate alike colors. Finally, we glued each bottle cap down to complete our recycled mosaics!


Thursday, February 16, 2012
Still Life Flowers


We also learned about the artistic technique of drawing and painting a still life. A still life is when make a drawing based on a gathering of inanimate objects in the middle of a table; like a vase of flowers or bowl of fruit. Many famous artists started with still life art before going on to more complicated artforms. It is a great tool to gain more artistic skill.
We also learned the difference between cool colors (blues, purples, and greens) and warm colors (reds, oranges, and yellows). You can see these represented in van Gogh's flowers (pictured above).
This was the first lesson we did where the students did their artwork on the tar paper. I loved the way they turned out. They started with a chalk outline and filled it in with oil pastel.

Once the artwork was complete, I put a thin coat of acrylic varnish on top. When it dries the chalk outlines dissapear; leaving a lot of great contrast. The dissapearing chalk reveals the black of the paper underneath.


Wednesday, February 1, 2012
Recycled Crayons

All you have to do is:

- Collect some silicone ice trays (I got all of mine at the dollar tree)
- Remove all paper wrappers from crayons (this part is tedious and boring)
- Break crayons into small, manageable pieces that will easily fit into the trays
- Fill the trays to the top with crayon pieces, be creative...mix the colors up!
- Place in a 200 degree oven
- Check to see if they are all melted in about 5-10 minutes
- Carefuly remove trays from oven, set aside to let crayons cool down (I had a little fun creating a marble effect in the hot crayons with a toothpick!)
- After about 15 mninutes, pop crayons out of trays (don't wait to long because they will be too hard to get out)
- COLOR!

Wednesday, January 25, 2012

Monday, January 16, 2012
Sawdust!
I have been working hard all weekend cutting, sanding and drilling lumber in preparation for a sculpture project I am going to be teaching to my 4th and 5th graders next month...There is sawdust everywhere! In my yard, in my kitchen, on me...but it will all be worth it! :) I need to thank my friend Brady and my John for helping me with all of the preparations!

 Here are some pictures. Any clue as to what we will be making? Anyone?!


Tuesday, January 10, 2012
Student Teacher!
Breaking News: Student Teacher Coming to an Art Room Near You!
I am so excited! Starting next week, we will have a guest in our art from for a couple of months. I will be serving as the cooperating teacher. I feel so lucky to have an extra set of "art eyes" and "art hands" to help out in the classroom. In the beginning she will be just observing what goes on in our classroom, but towards the end she will be teaching some art lessons to the kids. What a great opportunity for our students to learn about art from a fresh perspective.
Monday, December 19, 2011
I just started a new pin board on pinterest today for art education ideas. I am so excited because it is an amazing vehicle to collect all of the ideas. I can go there and sif through them all. Some pins are on possible art lessons, some art links to other art education blogs and some are even art handouts you can print out.

Check it out here if you like and remember that as I keep pinning the board will grow!

Thursday, November 17, 2011
Picasso to Warhol

The High Museum of Art in Atlanta, Georgia has a fabulous exhibit going on right now called Picasso to Warhol. I got the pleasure of seeing it myself a few weeks ago. It is fabulous! Low and behold, when I went to the AAEA fall conference the next weekend, there was a workshop about incorporating art from the exhibit into the classroom...of course I picked up the packet on that!
The show is so wonderful, and I kept thinking of my students as I passed Andy Warhol's soup cans and Joan Miro's funky "shape people" (that's what we called them in my class previously). Never have I seen so many famous modern artists shown in one space. The exhibit will be going on until April 29, 2012.
If you get a chance, please check it out! Even if you can't make the trip, check out their online resources.

Wednesday, November 16, 2011
Owl Moon
 My 3rd, 4th, and 5th graders have been working on our "Owl Moon" project for a couple of weeks now. In case you didn't know, I persnoally adore owls. They are my favorite animal (besides my pup Luna) and I have been collecting them in the form of jewelry, figurines, art, and anything really for years now.
In this art lesson, we read the book "Owl Moon" by Jane Yolen and assembled our own artwork of an owl on a branch with a moon in the background.
We learned about owls, their habitats, their feather colors, and the food they eat. We also learned that most, but not all, owls are nocturnal (meaning they sleep during the day and hunt and stay out during the night). We also learned that owls can turn their heads all the way around and look behind them. We learned that their feathers are natural colors like browns, grays, white, and blacks so that they can blend in like camouflauge. This is so they can hide from their prey and their preditors. We learned about barn owls, snowy owls, the great horned owl, and the burrowing owl. Did you know that most owls don't even make their own nests? Instead they wait for other birds to move on and they repurpose the nests for their own needs.
Here are some finished art pieces from my students. First, they cut out a branch and glued it on the bottom of their paper. Then they drew an owl on another piece of construction paper. They colored in their owls with neutral colored oil pastels and added details in the form of lines, shapes, and patterns. Next, they cut out their owls and glued them onto the branch. To finish, they drew a moon up top!


Wednesday, November 9, 2011
Tar Paper Paintings
 I went to the AAEA (Alabama Art Education Association) fall conference this weekend and got to share ideas with fellow art educators...how glorious! Being a singular art teacher within my school, I often feel isolated. I also don't get the wonderful opportunity to collaborate with other teachers in my content all of the time like the classroom teachers do. So, this conference was a welcome change in that regard!
I got the pleasure of meeting Nacy Raia, the community outreach director at Eastern Shore Art Center in Fairhope Alabama. She was also named "Special Needs Art Educator of the Year" for 2011 in Alabama. Go Nancy! She showed some of her students artwork. The artwork was created by painting onto tar paper with acrylic paint. She finished them by varnishing over them. The aquatic themed paintings were created as a response to the recent Gulf oil spill. I think they are beautiful! In case you are wondering, yes tar paper is that stuff you put on a roof before you put down shingles. You can get it at your local hardware store in a large roll for around $20 and cut it to size as you need it.

I already purchased some tar paper for my classroom and can't wait to experiment with painting on it with my students. Wish us luck!
Sunday, October 30, 2011
Matryoshkas

We also talked about how symmetry is shown in artwork if you can draw a line down the middle and have both sides equal. Students also drew their matryoshkas in descending size order (from big to small) to demonstrate the art concepts of proportion and scale. Students also learned how to draw proper facial features.

Some students in 4th and 5th grade got the opportunity to write a letter to a pen pal in Russia. I will be sending those letters to an English speaking school in Moscow soon and we hope to get some back!

Saturday, October 29, 2011
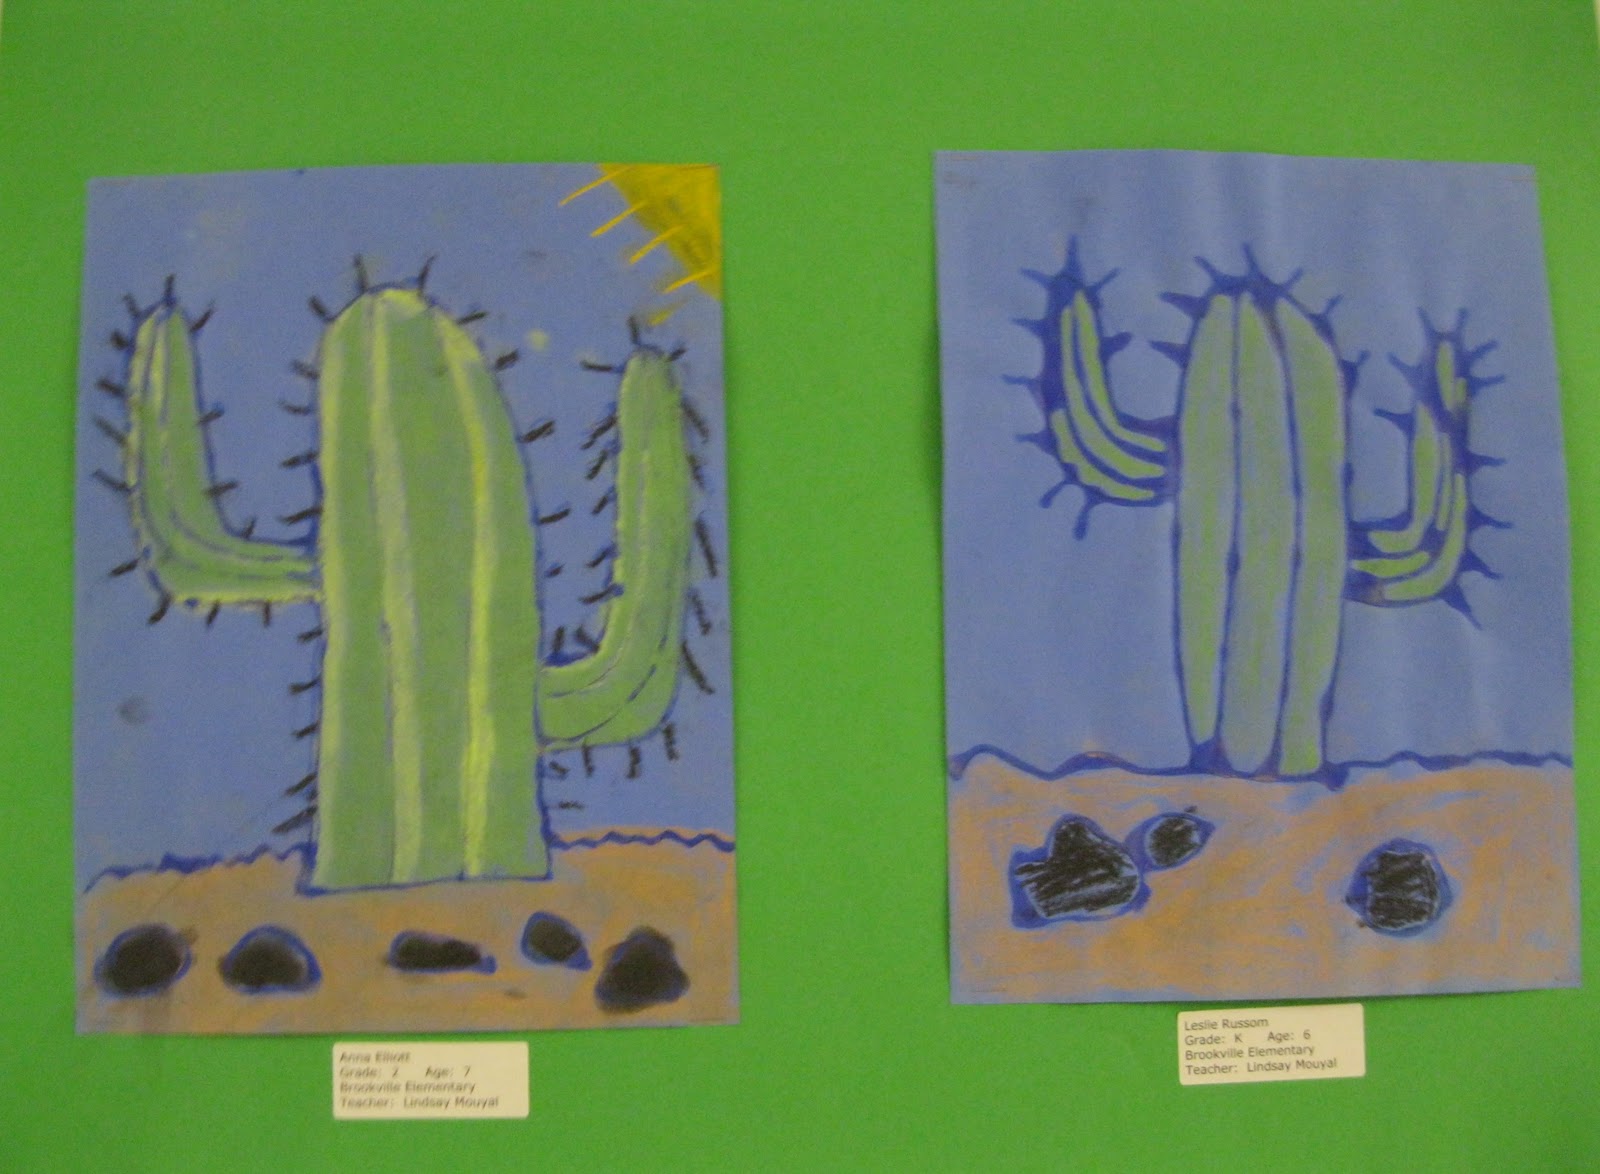
Botanical Gardens County Elementary Show


Sunday, September 18, 2011
Inuit Line Animals
In this art lesson, we learned about the Inuit people of Alaska and Canada. We discussed their lifestlye and the climate of the areas the live in. We also discussed the importance of animals within their culture.
Next, we looked at examples of various lines. We discusses the meaning of the art element line.
For the lesson, students were shown (step by step) to draw an animal. They had to pick either an owl, a fish, or a cat. To complete their artwork, they filled their animals with many different lines. I love how this project turned out! So detailed and vivid!


Next, we looked at examples of various lines. We discusses the meaning of the art element line.
For the lesson, students were shown (step by step) to draw an animal. They had to pick either an owl, a fish, or a cat. To complete their artwork, they filled their animals with many different lines. I love how this project turned out! So detailed and vivid!


Tuesday, September 6, 2011


Saturday, September 3, 2011
Barts Art Cart Family Days
 The Birmingham Museum of Art is having family days at the museum every Saturday and Sunday in September. It is FREE! And kids get to complete an art project and bring it home.
Saturdays are from 11-1
Sundays are from 1-3
Friday, September 2, 2011
Illuminated Manuscripts
In this art lesson, students learned about the Illuminated manuscripts that existed across many cultures (including Irish, Roman, Islamic, etc.) beginning around 400 AD. We looked at examples of some illuminated manuscripts like the ones below. Typically, illuminated manuscripts refered to books that had elaborate illustrations throughout. They also usually incorporated silver or gold painted text in the form of enlarging the first letter at the beginning of a chapter. This is similar to classic nursery rhyme books too.

For the art lesson, students painted the first letter of their first name a metallic color. Then they glued it to the middle of the paper and added a frame around it. They completed the artwork by drawing lines, floral motifs, shapes, and patterns around the letters. Here are some examples from my students' completed artwork.


For the art lesson, students painted the first letter of their first name a metallic color. Then they glued it to the middle of the paper and added a frame around it. They completed the artwork by drawing lines, floral motifs, shapes, and patterns around the letters. Here are some examples from my students' completed artwork.

Tuesday, August 23, 2011
Welcome Back!
Welcome Back! It's going to be a great school year. I can't wait to see what my students create this year. I am also very excited about the new "choice center" in my classroom. I will post more about it later; but basically it is an area in the classroom filled with art activites that students can help themselves to if they finish their artwork early. Some of the activities include: free draw with drawing boards, word bubble art critique, art books, free-sculpt with play-doh, puzzles, art word bingo, and one of my favorites, magnetic mosaics.
Here is a picture of the magnetic mosiacs. In this activity, students can create a mosaic using various colored magnets.

If you have any questions, comments, or ideas for our art program...leave me a comment!
Stay tuned for more exciting news throughout the school year about what is going on in the art room and in the arts community of our area!
Also, look for art newsletters throughout the year in your child's agenda/backpack!
Here is a picture of the magnetic mosiacs. In this activity, students can create a mosaic using various colored magnets.

If you have any questions, comments, or ideas for our art program...leave me a comment!
Stay tuned for more exciting news throughout the school year about what is going on in the art room and in the arts community of our area!
Also, look for art newsletters throughout the year in your child's agenda/backpack!
Friday, May 20, 2011
Art Show!


Instead of grouping art by class, or grade level, I keep art from the same project together.
I like this, because it showcases the many different styles of our students among a single project. I also include a sign by each project that tells a little bit about the art history inspiration, our art making process, and an image of art history examples.


Thursday, May 12, 2011
Mixed Media Windows

One of the main mediums I create my own art in is mixed media reverse painting and collage on old windows. My best friend's dad had all of the windows in his house replaced and gave me some 30 plus windows. My studio at home could not handle such a large quantity and I immediately thought about doing a lesson with my older students with the windows.
I also connected it to behavior and effort. At the beginning of the school year, I showed my students examples of my window art and the blank windows I had brought to school. I informed them that if they worked hard on their art throughout the year and had good behavior as a class, that we would create a collaborative artwork on a window in the Spring.
I collected old education books and maps from the thrift stores and let them cut out images that they liked to collage onto the back. Then the classes brainstormed on shapes, and each class voted on one shape to use to create a repetition on their window. They drew them on with sharpe markers. Finally, they finished the windows by painting them.
Subscribe to:
Posts (Atom)