
Monday, December 19, 2011
I just started a new pin board on pinterest today for art education ideas. I am so excited because it is an amazing vehicle to collect all of the ideas. I can go there and sif through them all. Some pins are on possible art lessons, some art links to other art education blogs and some are even art handouts you can print out.

Check it out here if you like and remember that as I keep pinning the board will grow!
Thursday, November 17, 2011
Picasso to Warhol

The High Museum of Art in Atlanta, Georgia has a fabulous exhibit going on right now called Picasso to Warhol. I got the pleasure of seeing it myself a few weeks ago. It is fabulous! Low and behold, when I went to the AAEA fall conference the next weekend, there was a workshop about incorporating art from the exhibit into the classroom...of course I picked up the packet on that!
The show is so wonderful, and I kept thinking of my students as I passed Andy Warhol's soup cans and Joan Miro's funky "shape people" (that's what we called them in my class previously). Never have I seen so many famous modern artists shown in one space. The exhibit will be going on until April 29, 2012.
If you get a chance, please check it out! Even if you can't make the trip, check out their online resources.

Wednesday, November 16, 2011
Owl Moon
 My 3rd, 4th, and 5th graders have been working on our "Owl Moon" project for a couple of weeks now. In case you didn't know, I persnoally adore owls. They are my favorite animal (besides my pup Luna) and I have been collecting them in the form of jewelry, figurines, art, and anything really for years now.
In this art lesson, we read the book "Owl Moon" by Jane Yolen and assembled our own artwork of an owl on a branch with a moon in the background.
We learned about owls, their habitats, their feather colors, and the food they eat. We also learned that most, but not all, owls are nocturnal (meaning they sleep during the day and hunt and stay out during the night). We also learned that owls can turn their heads all the way around and look behind them. We learned that their feathers are natural colors like browns, grays, white, and blacks so that they can blend in like camouflauge. This is so they can hide from their prey and their preditors. We learned about barn owls, snowy owls, the great horned owl, and the burrowing owl. Did you know that most owls don't even make their own nests? Instead they wait for other birds to move on and they repurpose the nests for their own needs.
Here are some finished art pieces from my students. First, they cut out a branch and glued it on the bottom of their paper. Then they drew an owl on another piece of construction paper. They colored in their owls with neutral colored oil pastels and added details in the form of lines, shapes, and patterns. Next, they cut out their owls and glued them onto the branch. To finish, they drew a moon up top!


Wednesday, November 9, 2011
Tar Paper Paintings
 I went to the AAEA (Alabama Art Education Association) fall conference this weekend and got to share ideas with fellow art educators...how glorious! Being a singular art teacher within my school, I often feel isolated. I also don't get the wonderful opportunity to collaborate with other teachers in my content all of the time like the classroom teachers do. So, this conference was a welcome change in that regard!
I got the pleasure of meeting Nacy Raia, the community outreach director at Eastern Shore Art Center in Fairhope Alabama. She was also named "Special Needs Art Educator of the Year" for 2011 in Alabama. Go Nancy! She showed some of her students artwork. The artwork was created by painting onto tar paper with acrylic paint. She finished them by varnishing over them. The aquatic themed paintings were created as a response to the recent Gulf oil spill. I think they are beautiful! In case you are wondering, yes tar paper is that stuff you put on a roof before you put down shingles. You can get it at your local hardware store in a large roll for around $20 and cut it to size as you need it.

I already purchased some tar paper for my classroom and can't wait to experiment with painting on it with my students. Wish us luck!
Sunday, October 30, 2011
Matryoshkas

We also talked about how symmetry is shown in artwork if you can draw a line down the middle and have both sides equal. Students also drew their matryoshkas in descending size order (from big to small) to demonstrate the art concepts of proportion and scale. Students also learned how to draw proper facial features.

Some students in 4th and 5th grade got the opportunity to write a letter to a pen pal in Russia. I will be sending those letters to an English speaking school in Moscow soon and we hope to get some back!

Saturday, October 29, 2011
Botanical Gardens County Elementary Show


Sunday, September 18, 2011
Inuit Line Animals
In this art lesson, we learned about the Inuit people of Alaska and Canada. We discussed their lifestlye and the climate of the areas the live in. We also discussed the importance of animals within their culture.
Next, we looked at examples of various lines. We discusses the meaning of the art element line.
For the lesson, students were shown (step by step) to draw an animal. They had to pick either an owl, a fish, or a cat. To complete their artwork, they filled their animals with many different lines. I love how this project turned out! So detailed and vivid!


Tuesday, September 6, 2011

Saturday, September 3, 2011
Barts Art Cart Family Days
 The Birmingham Museum of Art is having family days at the museum every Saturday and Sunday in September. It is FREE! And kids get to complete an art project and bring it home.
Saturdays are from 11-1
Sundays are from 1-3
Friday, September 2, 2011
Illuminated Manuscripts
In this art lesson, students learned about the Illuminated manuscripts that existed across many cultures (including Irish, Roman, Islamic, etc.) beginning around 400 AD. We looked at examples of some illuminated manuscripts like the ones below. Typically, illuminated manuscripts refered to books that had elaborate illustrations throughout. They also usually incorporated silver or gold painted text in the form of enlarging the first letter at the beginning of a chapter. This is similar to classic nursery rhyme books too.

For the art lesson, students painted the first letter of their first name a metallic color. Then they glued it to the middle of the paper and added a frame around it. They completed the artwork by drawing lines, floral motifs, shapes, and patterns around the letters. Here are some examples from my students' completed artwork.


For the art lesson, students painted the first letter of their first name a metallic color. Then they glued it to the middle of the paper and added a frame around it. They completed the artwork by drawing lines, floral motifs, shapes, and patterns around the letters. Here are some examples from my students' completed artwork.

Tuesday, August 23, 2011
Welcome Back!
Welcome Back! It's going to be a great school year. I can't wait to see what my students create this year. I am also very excited about the new "choice center" in my classroom. I will post more about it later; but basically it is an area in the classroom filled with art activites that students can help themselves to if they finish their artwork early. Some of the activities include: free draw with drawing boards, word bubble art critique, art books, free-sculpt with play-doh, puzzles, art word bingo, and one of my favorites, magnetic mosaics.
Here is a picture of the magnetic mosiacs. In this activity, students can create a mosaic using various colored magnets.

If you have any questions, comments, or ideas for our art program...leave me a comment!
Stay tuned for more exciting news throughout the school year about what is going on in the art room and in the arts community of our area!
Also, look for art newsletters throughout the year in your child's agenda/backpack!
Friday, May 20, 2011
Art Show!


Instead of grouping art by class, or grade level, I keep art from the same project together.
I like this, because it showcases the many different styles of our students among a single project. I also include a sign by each project that tells a little bit about the art history inspiration, our art making process, and an image of art history examples.


Thursday, May 12, 2011
Mixed Media Windows

One of the main mediums I create my own art in is mixed media reverse painting and collage on old windows. My best friend's dad had all of the windows in his house replaced and gave me some 30 plus windows. My studio at home could not handle such a large quantity and I immediately thought about doing a lesson with my older students with the windows.
I also connected it to behavior and effort. At the beginning of the school year, I showed my students examples of my window art and the blank windows I had brought to school. I informed them that if they worked hard on their art throughout the year and had good behavior as a class, that we would create a collaborative artwork on a window in the Spring.
I collected old education books and maps from the thrift stores and let them cut out images that they liked to collage onto the back. Then the classes brainstormed on shapes, and each class voted on one shape to use to create a repetition on their window. They drew them on with sharpe markers. Finally, they finished the windows by painting them.
Monday, May 9, 2011
Louise Nevelson's Found Art Sculptures

I collected various "found" objects (such as bottle caps, plastic cups, buttons, puzzle pieces, etc...) and organized them in a chip/dip bowl in the middle of the table. Each student was instructed to pick two objects. Then, one table at a time, they brought me their objects and we worked together to get them all glued down into our shoebox.
After it all dried, we painted them all one color to mimick the larger scale sculptures by artist Louise Nevelson.

Wednesday, March 23, 2011
Faith Ringgold's Flag Story Quilts
Faith Ringgold is a famous African-American, female artist who grew up in Harlem, New York. Her artwork is inspired both by her memories of helping her mother sew and craft as well as her experiences with painting in college. Faith Ringgold combines sewing, painting, and text to create beautiful "Story Quilts." One of her artworks, titles "Flag Story Quilt," combines vivd textiles in red, with newspaper clippings to create an abstract version of the American flag. Here is Faith Ringgold's "Flag Story Quilt."
 In this lesson, students created their very own flag story quilt by building a flag collage. Students cut out paper from magazines, patterned paper, and plain paper. They glued down their stripes to create the basic flag design and finished of their flags by adding abstract shapes to represent the stars. Here is a student example of the flag story quilt:


Tuesday, March 15, 2011
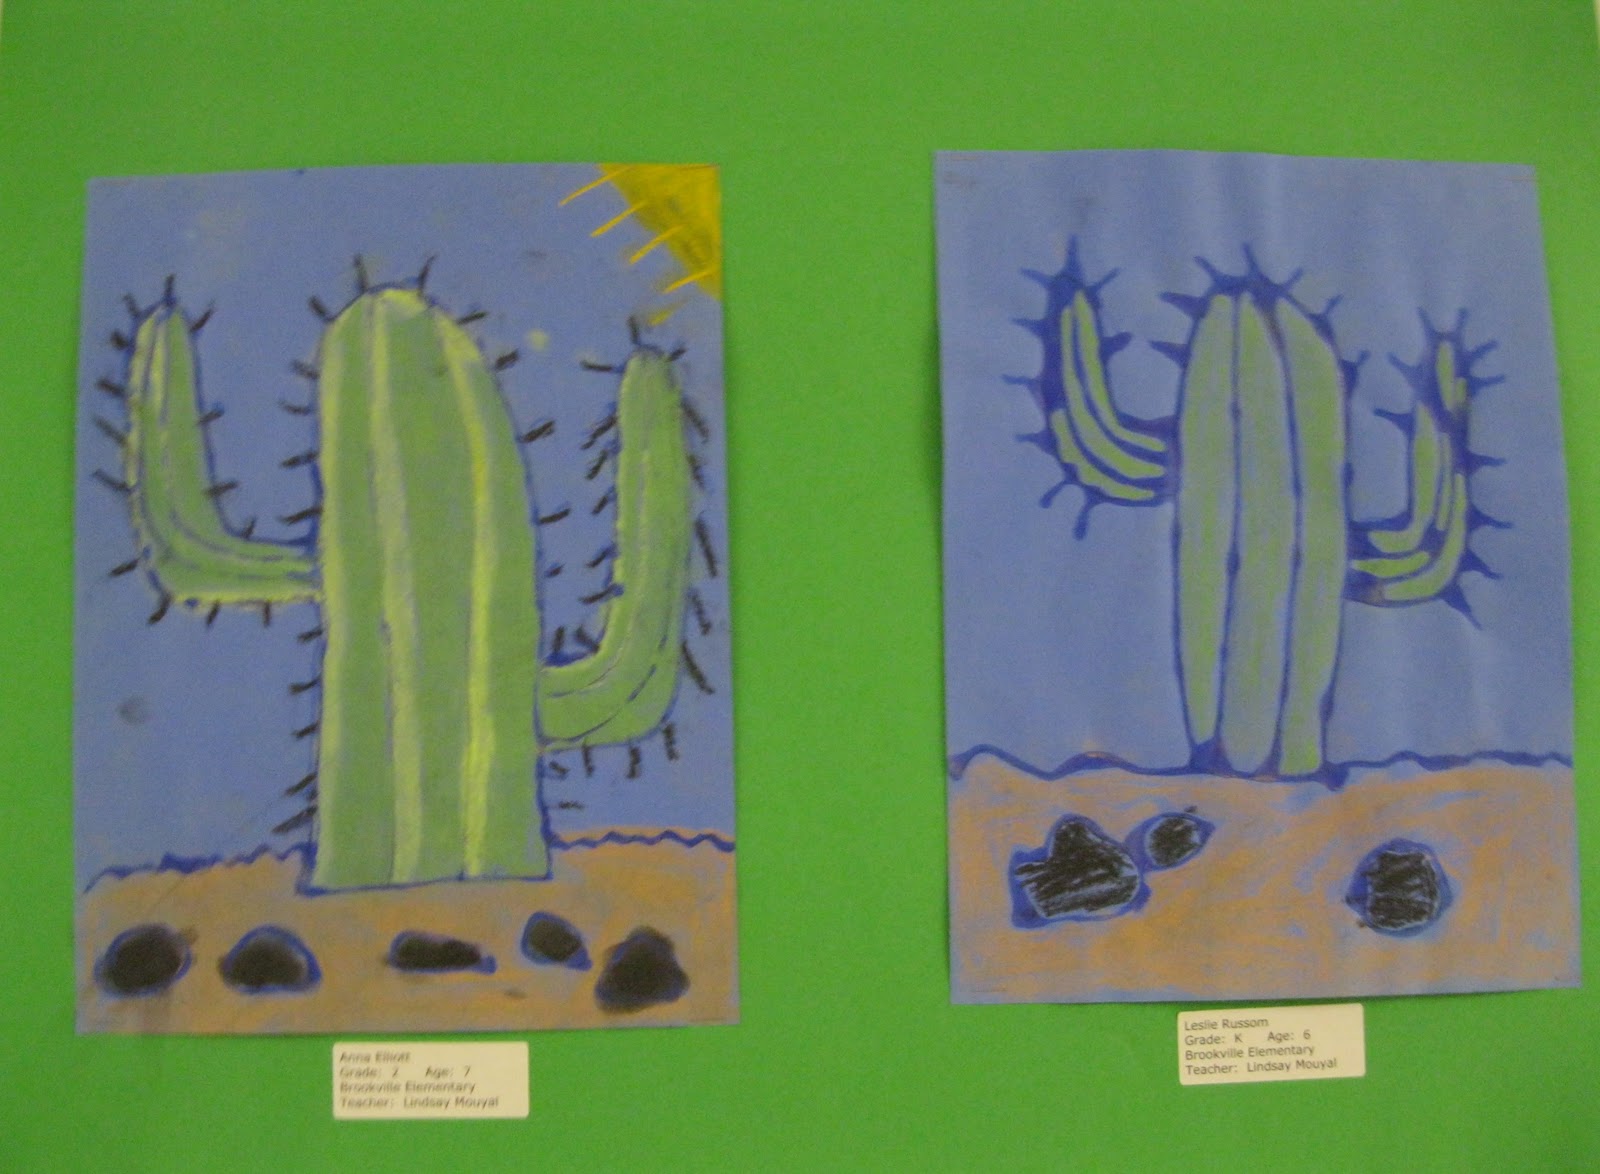
Cactus Drawings
We had so much fun doing this lesson. During this lesson, we discussed the cactus plant and other varieties of succulent plants. Students learned about the type of environment cactus plants flourish (hot, dry, and desert like). They also learned the importance of the cactus plants spikes (to protect their mosture from predators). After looking at many pictures of cactus plants and talking about them, students were given step-by-step instructions on how to build their cactus drawing. We drew the cactus with pencil on blue construction paper first. Then we traced the cactus with white Elmer's glue. After the glue outline dried, students filled int he cactus using soft chalk pastels. To make their cactus drawings look more realistic, students created shadows with darker shades of green and highlights with lighter shades of green and yellow!


Wednesday, March 9, 2011
Chinese Scroll Paintings
During the second semester of the school year, I have the great pleasure of teaching an art enrichment course. This class consists of hand-selected students from 3rd, 4th, and 5th grades. Students are chosen to participate in the class based on positive behavior and artistic skill. The class is a real joy to teach, because with smaller nubmers and smaller classroom management issues, we can really have fun making art. I also get to interact one-on-one with the students a lot, which is amazing!

 For our first project, we learned about Chinese scroll paintings. Students started by drawing a vertical composition (most popular designs included floral motifs such as a cherry blossom tree, landscape designs including mountains and rivers, and bamboo plants sweeping across the page in intense diagonals). After students drew their pictures, they filled them in with watercolors (using wet and dry brush techniques). Next, they picked Chinese characters symbolizing words that they thought suited their picture and drew them in the upper corner. Each student "signed" their piece using a unique red stamp seal they created on their own by carving into styrofoam with a pencil. Finally, they added a black bar on top and bottom to complete the scroll! Aren't they beautiful?


Wednesday, February 16, 2011
Lascaux Cave Drawings


The cave drawings are believed to date back over 17,000 years; making them the oldest art known about in the entire world! The story goes that 4 teenage boys discovered the cave in 1940 when they noticed a hole in the ground where a tree once stood. A lightning storm had struck the tree, revealing the hidden cave underneath. Imagine how special you might feel if you were one of the 4 lucky boys who discovered the oldest art in the world!
In this art lesson, students were instructed to draw at least 2 animals (like those seen at Lascaux: cows, bulls, deer, bears, or a unicorn) and at least 3 symbols. After students designed the composition of their drawing on a practice sheet, they completed a final drawing and added color with oil pastels. We used a manilla paper to mimic the look of the ancient cave.
Sunday, January 23, 2011
Watercolor Flowers


Subscribe to:
Posts (Atom)